Battles
/battles
Battles
18 battles, from the Town districts and floodgates to the sewers and the Sewer Arena, with the defense power, squads and rewards of each.
Battles are started on the Day of Sloth only, at the guard post for the Town battles and at the looters' camp for the sewer battles, and fought with zombie squads and the defenses built around the base. Each one names a minimum defense power and a number of squads. A battle is won by capturing every enemy flag and still holding all of them when its waves end, and lost at once when the enemies take the Keeper's base or the Keeper's health runs out.
- 18
- Battles
- 7
- Arena rounds
- 144
- Highest defense power
- Sloth
- Battle day
The number next to the sword is the total of the barricades and archer towers around the base plus the squads brought from the Barracks. Each barricade or tower adds its defense power (listed below); every squad zombie that carries both a pike or bow and armor adds the defense power of the two items; hired mercenaries add 8.
Every battle

1 squad, 12 defense power required. Rewards: 1 Defender's Emblem, 6 Zombie goo and 4 Town Gratitude. Quest: First... Sludge?
1 squad, 12 defense power required. Rewards: 1 Defender's Emblem, 6 Zombie goo and 4 Town Gratitude. Quest: Hope It Doesn't go South.
2 squads, 20 defense power required. Rewards: 1 Victory Banner, 6 Zombie goo and 4 Town Gratitude. Quest: Hope It Doesn't go South.
2 squads, 22 defense power required. Rewards: 6 Zombie goo and 4 Town Gratitude. Quest: Plaza Battle.
2 squads, 36 defense power required. Rewards: 1 Defender's Emblem, 6 Zombie goo and 4 Town Gratitude. Quest: Street Battles.
3 squads, 56 defense power required. Rewards: 1 Victory Banner, 6 Zombie goo and 4 Town Gratitude. Quest: Street Battles.
3 squads, 56 defense power required. Rewards: 10 Zombie goo and 8 Town Gratitude. Quest: Water Locked.
3 squads, 80 defense power required. Rewards: 10 Zombie goo and 8 Town Gratitude. Quest: Steamy Royal.
3 squads, fought straight after the previous part. Rewards: 10 Zombie goo and 8 Town Gratitude. Quest: Steamy Royal.
3 squads, 64 defense power required. Rewards: 10 Zombie goo and 8 Town Gratitude. Quest: Still Standing on Stilts.
3 squads, 72 defense power required. Rewards: 10 Zombie goo and 8 Town Gratitude. Quest: Dirt Rights.
3 squads, fought straight after the previous part. Rewards: 10 Zombie goo and 8 Town Gratitude. Quest: Dirt Rights.
3 squads, 96 defense power required. Rewards: 3 Keys for Looters, 1 Victory Banner, 4 Zombie goo and 1 Defender's Emblem. Quest: Steamy Royal.
4 squads, 144 defense power required. Rewards: 3 Keys for Looters, 4 Zombie goo and 3 Town Gratitude. Quest: The Last Battle.
1 squad, 8 defense power required. Rewards: 3 Keys for Looters, 4 Zombie goo and 3 Town Gratitude. Quest: Battles in the Sewers.
2 squads, 24 defense power required. Rewards: 3 Keys for Looters, 4 Zombie goo and 3 Town Gratitude. Quest: Battles in the Sewers.
1 squad, 6 defense power required. Rewards: 3 Keys for Looters, 4 Zombie goo and 3 Town Gratitude.
7 arena rounds, from 36 to 116 defense power and 2 to 4 squads.
Defenses
Barricades and archer towers are built around the base. Their health and damage are set when the battle starts: War Supplier adds health to all of them, War Engineer adds damage to tower arrows and to spikes. Enemy zombies wear no armor, so nothing is taken off an arrow or a spike. A spiked barricade hits back every zombie whose blow damages it; a Spitter Zombie's spit is not answered.
Barricades and archer towers: the defense power each adds, its health, and the damage it deals to an enemy zombie.
| Defense | Defense power | Health | Damage per arrow | Range | Spikes: damage back per blow taken | |
|---|---|---|---|---|---|---|
 | Barricade I | +2 | 400 (440 with War Supplier) | Does not shoot | None | None |
 | Barricade II | +4 | 600 (660 with War Supplier) | Does not shoot | None | None |
 | Barricade III | +6 | 800 (880 with War Supplier) | Does not shoot | None | None |
 | Spiked Barricade I | +2 | 250 (275 with War Supplier) | Does not shoot | None | 3 (4 with War Engineer) |
 | Spiked Barricade II | +4 | 450 (495 with War Supplier) | Does not shoot | None | 5 (7 with War Engineer) |
 | Spiked Barricade III | +6 | 600 (660 with War Supplier) | Does not shoot | None | 7 (10 with War Engineer) |
 | Fortified Barricade I | +2 | 600 (660 with War Supplier) | Does not shoot | None | None |
 | Fortified Barricade II | +4 | 800 (880 with War Supplier) | Does not shoot | None | None |
 | Fortified Barricade III | +6 | 1000 (1100 with War Supplier) | Does not shoot | None | None |
 | Archer Tower I | +2 | 150 (200 with War Supplier) | 8 (12 with War Engineer) | 7 | None |
 | Archer Tower II | +4 | 300 (400 with War Supplier) | 16 (20 with War Engineer) | 7 | None |
 | Archer Tower III | +6 | 450 (550 with War Supplier) | 24 (30 with War Engineer) | 7 | None |
Weapons
A hit deals the weapon's damage minus the target's armor, never less than 0. Enemy zombies wear no armor, so every number below is what one hit takes off an enemy zombie's health. A Door Zombie's door stops the arrows, sword blows and pike thrusts that hit it. The Keeper fights with the sword and the bow in the tool belt, and the bonuses below add up. Zombie fighters fight with a pike or a bow; the Fighter, Fighter II and Fighter III buffs from Damage Potions do not reach them, and God's fury only adds to their bows.
The Keeper's swords and bows: damage per hit on an enemy zombie, with each bonus, and the stamina one attack costs.
| Weapon | Damage per hit | With Sword Master | With God's fury | With Fighter / Fighter II / Fighter III | Stamina per attack | |
|---|---|---|---|---|---|---|
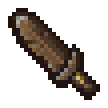 | Rusty Sword | 4 | 6 | 6 | 7 / 10 / 13 | 20 |
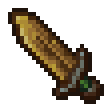 | Bronze Sword | 5 | 7 | 7 | 8 / 11 / 14 | 20 |
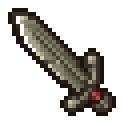 | Iron Sword | 7 | 9 | 9 | 10 / 13 / 16 | 20 |
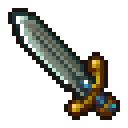 | Steel Sword | 10 | 12 | 12 | 13 / 16 / 19 | 20 |
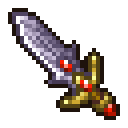 | Master Sword | 13 | 16 | 15 | 16 / 19 / 22 | 20 |
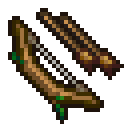 | Simple Bow | 4 | No change | 7 | 7 / 10 / 13 | 10 |
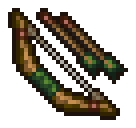 | Reinforced Bow | 8 | No change | 11 | 11 / 14 / 17 | 10 |
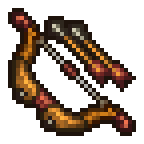 | Battle Bow | 15 | No change | 18 | 18 / 21 / 24 | 10 |
 | Heavy Bow | 22 | No change | 25 | 25 / 28 / 31 | 10 |
Zombie fighters' bows and pikes: damage per hit on an enemy zombie, range, pause between attacks, and the defense power a squad zombie gets from the weapon.
| Weapon | Type | Damage per hit | With the zombie perk | With God's fury | Range | Pause between attacks | Defense power | |
|---|---|---|---|---|---|---|---|---|
| Simple Bow | Bow | 4 | 7 (Blindseye) | 7 | 6 | 1 s (0.5 s with Zombie Motivation) | +1 |
| Reinforced Bow | Bow | 8 | 11 (Blindseye) | 11 | 6 | 1 s (0.5 s with Zombie Motivation) | +1 |
| Battle Bow | Bow | 15 | 18 (Blindseye) | 18 | 6 | 1 s (0.5 s with Zombie Motivation) | +2 |
| Heavy Bow | Bow | 22 | 25 (Blindseye) | 25 | 6 | 1 s (0.5 s with Zombie Motivation) | +3 |
 | Simple Pike | Pike | 2 | 4 (Impaler) | No change | 2 | 0.65 s (0.325 s with Zombie Motivation) | +1 |
 | Light Pike | Pike | 4 | 6 (Impaler) | No change | 2 | 0.65 s (0.325 s with Zombie Motivation) | +1 |
 | Battle Pike | Pike | 6 | 8 (Impaler) | No change | 2 | 0.65 s (0.325 s with Zombie Motivation) | +2 |
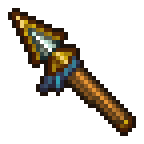 | Knight's Spear | Pike | 10 | 12 (Impaler) | No change | 2 | 0.65 s (0.325 s with Zombie Motivation) | +3 |
Armor
Body armor takes its defense off every hit its wearer takes, never below 0. The Keeper has 100 health and needs body armor and a sword in the tool belt to start a battle. A zombie fighter with the Tin Can perk takes 1 more off every hit.
Body armor: how much less damage every hit on its wearer deals, and the defense power a squad zombie gets from it.
| Armor | A hit on the Keeper or a zombie fighter wearing it deals | On a zombie fighter with Tin Can | Defense power | |
|---|---|---|---|---|
 | Rusty Armor | the full damage | 1 less damage | +0 |
 | Bronze Armor | 1 less damage | 2 less damage | +1 |
 | Iron Armor | 2 less damage | 3 less damage | +2 |
 | Steel Armor | 3 less damage | 4 less damage | +3 |
 | Master Armor | 4 less damage | 5 less damage | +4 |
Mercenaries
The four mercenaries from the Barracks fight as one squad: they take one of the battle's squad places and add 8 defense power. One payment hires them until a battle is won with them; a lost battle does not use it up. They cost more after every battle they win. Paying the fifth price starts the quest Inflation; once it is finished they are paid in wine instead of money.
Two fight with pikes and deal 4 damage per hit; two fight with bows and deal 8 damage per hit. The Fighter, Fighter II and Fighter III buffs from Damage Potions and God's fury do not change their hits.
Mercenary price, rising after each battle won with them.
| Hire | Price |
|---|---|
| First hire | 5 silver |
| After 1 win with them | 7 silver 50 bronze |
| After 2 wins with them | 10 silver |
| After 3 wins with them | 15 silver |
| After 4 wins with them | 20 silver |
| After 5 wins with them | 1 gold |
| After the quest Inflation | 3 Wine (gold quality) |
Battle potions

2 red runes. Restores 20 of the Keeper's 100 health.

4 red runes. Restores 40 of the Keeper's 100 health.

5 red runes. Restores the Keeper's health in full (100).

1 red, 1 green runes. Grants Fighter: +3 damage per hit with the Keeper's swords and bows for 30 s; zombie fighters, mercenaries and archer towers do not gain it.

2 red, 2 green runes. Grants Fighter II: +6 damage per hit with the Keeper's swords and bows for 30 s; zombie fighters, mercenaries and archer towers do not gain it.

3 red, 3 green runes. Grants Fighter III: +9 damage per hit with the Keeper's swords and bows for 30 s; zombie fighters, mercenaries and archer towers do not gain it.

1 red, 1 blue runes. Grants Zombie Motivation: the Keeper's zombie fighters wait half as long between attacks for 15 s.

1 red, 2 blue runes. Grants Zombie Motivation II: the Keeper's zombie fighters wait half as long between attacks for 30 s.

3 red, 3 blue runes. Grants Zombie Motivation III: the Keeper's zombie fighters wait half as long between attacks for 1 min.

1 red, 1 green, 1 blue runes. Grants Berserk: the Keeper's sword and bow attacks cost no stamina for 15 s.

2 red, 1 green, 1 blue runes. Grants Berserk II: the Keeper's sword and bow attacks cost no stamina for 30 s.

3 red, 2 green, 2 blue runes. Grants Berserk III: the Keeper's sword and bow attacks cost no stamina for 45 s.
Perks for battle

+10% health on every barricade (Barricade I: 400 to 440), and +50, +100 and +100 health on Archer Tower I, Archer Tower II and Archer Tower III.
Each tower arrow deals 4, 4 and 6 more damage (Archer Tower I, Archer Tower II and Archer Tower III), and spikes hit back for 1, 2 and 3 more (Spiked Barricade I, Spiked Barricade II and Spiked Barricade III).
+2 damage per hit with every sword the Keeper swings, +3 with the Master Sword.
Battle questions
When can a battle not start?
When it is not the Day of Sloth, when the Keeper has no sword or no body armor in the tool belt, or when the defense power (barricades, archer towers, squads and hired mercenaries) is below the battle's requirement.
What unlocks more squad slots?
Defender's Emblems unlock squad slots in the Barracks, up to 4; Break Through to the Port, Eastern Districts: Active Scouting, Central Districts Purge: Part I and Break Through to the Bathhouse Basement each award one. A squad holds 4 zombies, and a zombie only fights with armor and a pike or bow.
What are Keys for Looters for?
Break Through to the Bathhouse Basement, Final Battle, Sewer Brawl I, Sewer Brawl II, Sewer Cleanup I and Sewerena (The Sewer Arena) pay in them. They are used at the Port Club to place an order with the Looters.