Deathworm
CreatureMisc
- Spawns on
- 13 maps
- Abundance
- Very common
- Kill XP
- 3,000
- Taming
- Not tamable
Overview
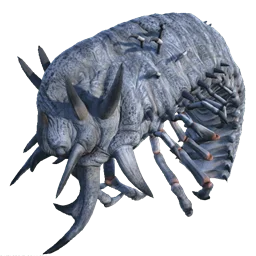
The Deathworm is a large carnivore known for its devastating damage output and structural destruction capabilities. It excels at demolishing enemy bases, making it a potent siege creature in PvP and PvE scenarios. Its compact size and high damage allow it to efficiently break through weaker fortifications while remaining agile underground.

Base statsLevel 1 values and gain per level
| Stat | Base | Wild +/lvl | Tamed +/lvl | Wild growth |
|---|---|---|---|---|
| Health | 20000 | +40 | +4% | |
| Stamina | 100 | +10 | +2% | |
| Torpidity | 0 | +0 | +0% | |
| Oxygen | 150 | +15 | +2% | |
| Food | 100 | +10 | +2% | |
| Weight | 100 | +2 | +0.8% | |
| Melee damage | 100% | +5% | +10% | |
| Movement speed | 100% | +0% | +1% |
TamingOpen calculator
Deathworm cannot be tamed.
Spawn zones
About spawn zones
Deathworm has recorded spawns on 13 maps: Scorched Earth, Astraeos, Ragnarok, Amissa, Forglar, Forglar Part II and 7 more.
Drops and interactions


Harvest yields by tool
Drops & harvest resources
Compare recorded corpse resource yields by harvesting tool.
SettingsHarvest body HP 820 · Player melee % 100 · Weapon damage % 100 · Harvest rate × 1
| Resource |  Pick |  Hatchet |
|---|---|---|
 Hide | ~3440% · ~26 hits | ~5060% · ~21 hits |
 Raw Meat | ~3860% · ~26 hits | ~2540% · ~21 hits |
 Raw Prime Meat | ~610% · ~26 hits | ~2560% · ~21 hits |
 Keratin | ~7645% · ~26 hits | ~7645% · ~21 hits |
Each harvest event rolls resources independently. Actual yields vary.
Killing a Deathworm yields Deathworm Horn, Hide, Raw Meat, Raw Prime Meat, and Keratin. The Hatchet harvests the most Hide, while the Pick maximizes Raw Meat. Raw Prime Meat is best gathered with a Dino (Prime), and Keratin has no specific optimal tool.
Combat & abilities
Attacks and abilities
BreaksThatchWoodStoneMetalTek
- Bite
Base damage130
- Thatch715
- Wood390
- Stone-
- Metal-
- Tek-
- Claw
Base damage130
- Thatch715
- Wood390
- Stone-
- Metal-
- Tek-
Damage taken
ResistsWeak to
Weapons
- Mining DrillImmune
- Stone weapons-34%
- Player melee-20%
- Piercing projectiles+40%
- Anti-creature damage+120%
Explosives
- Demolition explosives+50%
Creatures
- Creature attacks-50%
- Herbivore attacks-40%
- Strong creature attacks+50%
- Raid creature attacks+55%
Environment & other
- Plant Species X-50%
- Environmental damage-30%
- Spike Wall+400%
HitboxesHead ×1.5
Base damage at level 1, 100% taming effectiveness, no imprint. Open damage calculator
Combat notes
The Deathworm has a +400% weakness to SpikeWall damage, making spike walls extremely effective in base defense. It also takes +120% damage from Instant HurtDinos and +55% from Melee DmgMetal RaidDino attacks. Conversely, it has -100% resistance to MiningDrill Harvest and -50% to Melee WithProjectileImpactFX and Ranged Turret Small DefensePlant damage.
The Deathworm has a head hitbox that takes 1.5× damage, making headshots more effective for faster kills. All other body zones take standard damage.
Can break Thatch and Wood. Build at least in Stone.
ExperienceBase XP per kill: 3000
Deathworm kill XP
Base XP per kill: 3,000
Per kill
238,500 XP3,000 base × 15.9 level × 4 × 1.25× wild × 1× server
Server XP settings1× · wild 1.25 · alpha 1.33 · boss 5 · cave 1.33
Tips
The Deathworm takes +400% more damage from spike walls, making it highly vulnerable in fortified areas. Its MiningDrill Harvest resistance means it is immune to mining drill damage. It deals 225 damage with both Bite and Claw attacks, effective for structural destruction. Despite its power, it cannot gather resources while ridden.
This page details the Deathworm's stats, combat behavior, harvest drops, and damage modifiers. For further data, refer to the taming calculator, breeding calculator, and spawn map tools available on the site.